
How to reduce the image size in word and still keep the sharpness
- 24-07-2022
- trienkhaiweb
- 0 Comments
In the process of text editing, you not only sit and type, but you may also have to insert pictures to increase the attractiveness and vividness. However, there are times when you have trouble inserting images that are too large for the full layout. That loses balance and lacks aesthetics for the text, making the viewer feel unsightly. At the same time, when containing those image files will cause the file's memory capacity to increase, making it difficult for you to send over the internet. Therefore, the best option is to reduce the size of the image. How to do it, please refer to the following article.
Instructions to reduce image size in word
Currently, photos are available in many different sizes. Therefore, it is essential for you to put the image on word and resize it to fit the text layout. However, how to align properly so that the photos still have high quality is important.
The specific steps are as follows:
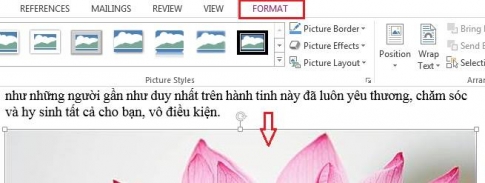
- Step 1: First, you open the file that you want to reduce the size of the image, click on an image that you want to reduce the size, then click the Format Tab on the Ribbon toolbar.

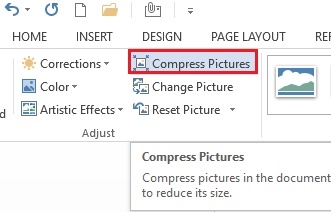
- Step 2: In the Format Tab, go to the Adjust group of commands and click "Compress Picture" .

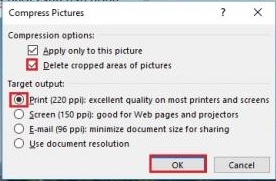
- Step 3: The "Compress Picture" dialog box appears, you need to put oil in the following two boxes:
+ Delate cropped areas of pictures : Delete cropped areas of pictures
Print (200 ppi) : Excellent quality on most printers and screens: Quality on most printers and monitors.
Once done, click “OK” to complete this step.

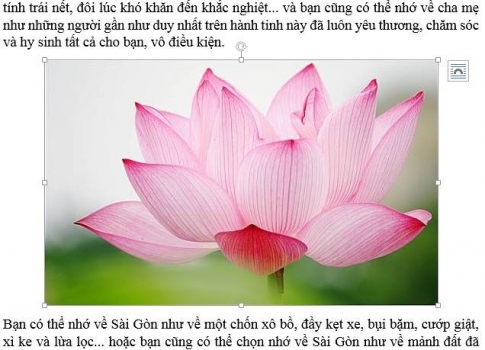
- Step 4: So you have installed and set up in the settings. The next step you need to do is to click on the image, move the mouse to any corner position. You wait for the mouse pointer to change to a two-way arrow, then you can drag the image to reduce the size. You can drag both the width and the width to the size you want.

Some of you wonder why it is necessary to set the settings before reducing the image size without doing it right from the beginning. Because, when we set such parameters, your image when edited will be reduced evenly across the dimensions of the image. Therefore, the image still retains the sharpness, the quality of the image still achieves high quality. As you say, you can still reduce the image size when not set. However, the image in your image will be distorted compared to the original, the image will be of lower quality.
With this article, I showed you how to reduce the image size in Word documents but still keep the image quality at the best level. If you use photos as accents in the text, your photo must meet the first requirements that are sharp and good quality. Therefore, apply the way to reduce the image size as I instructed above instead of doing it directly the first time. Surely, with this approach, you will not be disappointed in your photos. Wishing you success.


