

How to create a Shortcut for a document in Word
- 24-07-2022
- trienkhaiweb
- 0 Comments
When you work with a document in Word, make sure you open it often until the job is done. As such, it will be inconvenient and make you spend a lot of time searching. Especially the long documentaries I'm looking at unfinished. So today, I will show you how to open those files quickly with one mouse click. Are you curious how that is? That is creating a Shortcut for your document. So how to create, let's find out in the following article.
How to create a shortcut on word for a document in progress
- Step 1: You open the C drive on your computer and find the installation folder of Office 2013 by: After you open the C drive , click on the "Program Files" item. Next, click on the search box and type the words "Winword" . At that time, on your screen, a number of related options will appear. However, the option you choose has only the word “Winword” (as shown).

Or you can access it by path:
“C:Program FilesMicrosoft OfficeOffice15WINWORD.EXE”.
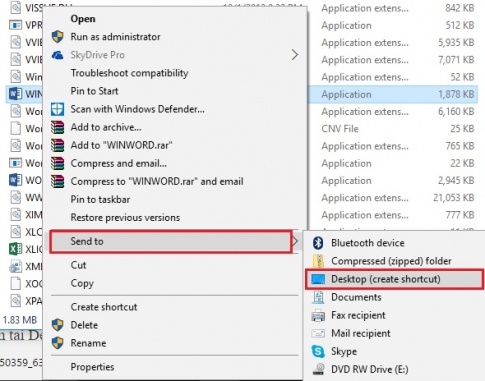
- Step 2: After finding it, move your mouse and right-click on that option. A menu will appear, hover your mouse over the "send to" section. Immediately a menu of "Send to" appears, select the item "Desk top (Create Shortcut)" .
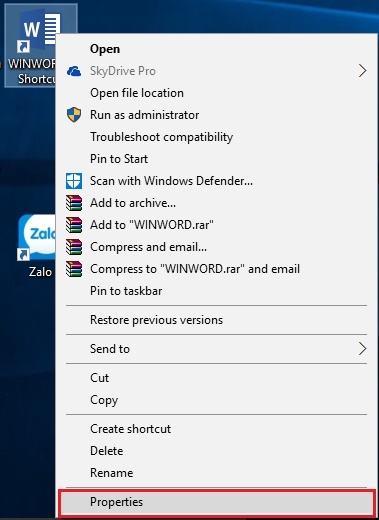
- Step 3: At this point, the WINWORD.EXE file appears on your computer screen. Now, right click on it and select “Properties”.
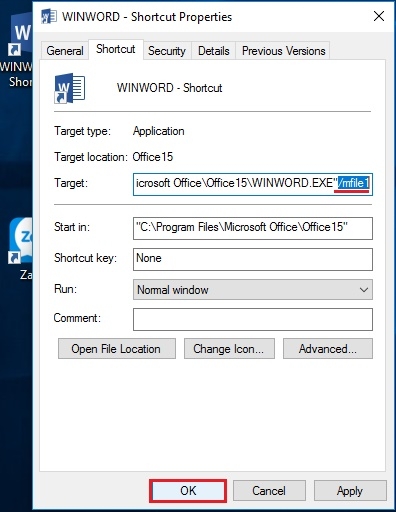
- Step 4: The Properties window appears. In the Target section, in the text in the box, add the end of the command " /mfile1" . Finally, click on “OK” .
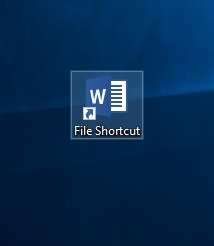
- Step 5: So now, you have finished creating Shortcut for your document. You just need to rename the file accordingly and according to your wishes.
Above, I have shown you how to view documents quickly and scientifically. With this method, you only need one click without having to spend time searching for your File. This is also a pretty cool feature of Word. If you are a person who often works with documents on word, I think this is a very good plan for you. Wishing you success.


