

How to create an automatic table of contents in Microsoft Word
- 24-07-2022
- trienkhaiweb
- 0 Comments
You already have complete documents, reports, dissertations, etc., it is difficult to find the content of the sections, and it is more complicated when the page number changes every time. Therefore, the automatic table of contents is an indispensable component.
Here, I will introduce in detail how to create an automatic table of contents in Microsoft word 2013.
Mục lục
1. Select the item to create a table of contents
First, we open the document to create a table of contents, select (highlight) the line of text that will be included in the table of contents.
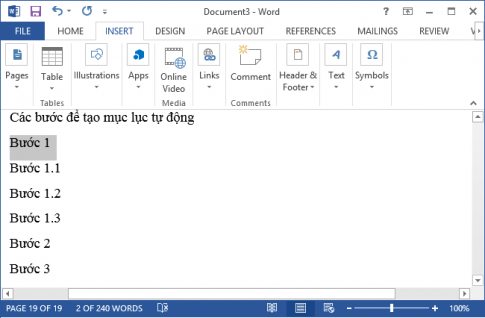
2. Go to “References then add text”
After selecting the item to create a table of contents, we go to "Reference then add text", then we choose the level for the table of contents.
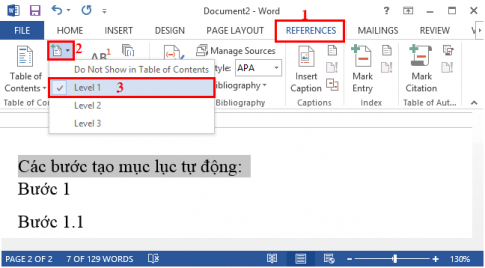
The rest of the items we do the same.
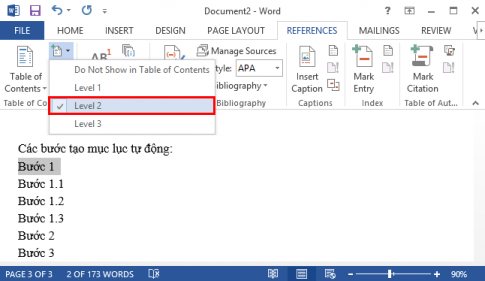
Note : we choose the appropriate sub-level for our article. The majority we choose at level 1, the more we go into detail, the lower the level.
3. Select the item format
After completing the items to do, we move the mouse pointer to the position of the table of contents. Go to "references select table of contents" to choose the format for your table of contents.
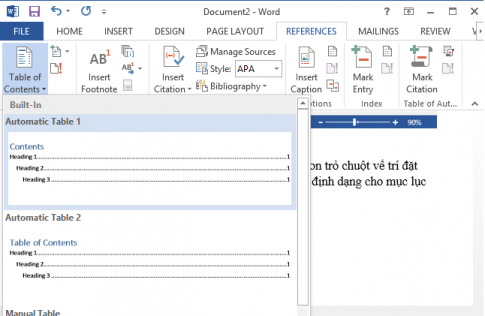
Table of contents after formatting
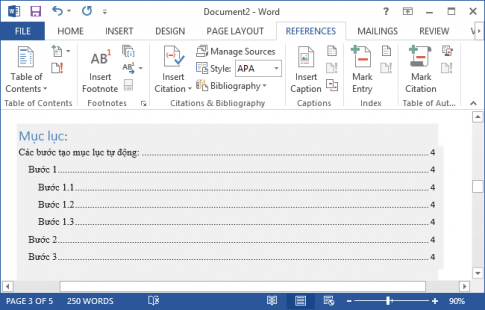
And after editing our text, we just need to update the table of contents by clicking on the table of contents area, then selecting "Update Table", ticking the box "Update entire table" and Ok to change.
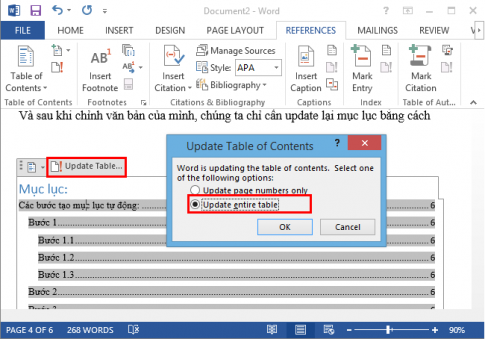
To go to the content you need in the table of contents, simply hold down Ctrl and click on that line of content.
In addition, we can choose the headings available in Home to choose the format for the subsections.
For Microsoft Word 2010 and Microsoft Word 2007 we operate in the same way as for Microsoft Word 2013.
Good luck !


