

How to create and edit tables in Excel 2013
- 24-07-2022
- thuypham
- 0 Comments
When using Excel, to make it easier to find, calculate, manage and analyze data, you need to create a table for the data in Excel. Creating a table in Excel is extremely simple. The following article will guide you to create and edit tables in the simplest and fastest way.
In this article, I do how to create a table and insert a table on Excel 2013. However, if you use Excel 2007, 2010, 2016 the method is similar.
The article consists of 2 parts:
- Create a table in Excel 2013
- Editing a table in Excel 2013
Mục lục
1. How to create a table in Excel 2013
For example, you have the following data:
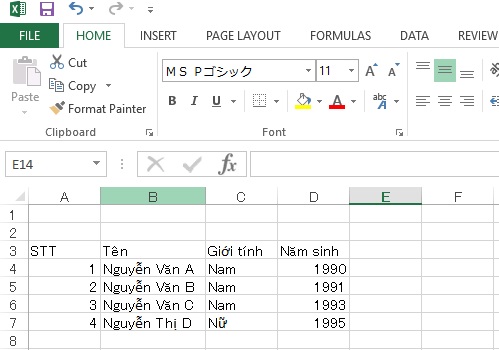
Now that you want to create a table for this data, you just need to follow these steps:
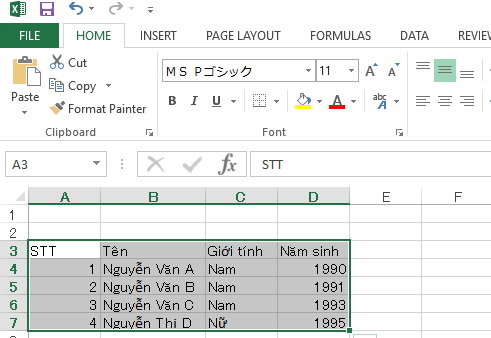
- Step 1: Select the range in which you want to create the table (these cells may or may not have data). You just need to hold the left mouse button and drag it to cover the data to create a table.
- Step 2: You look at the top menu, select Tab INSERT, then you choose TABLE. Or you can press Ctrl+T or Ctrl+L.
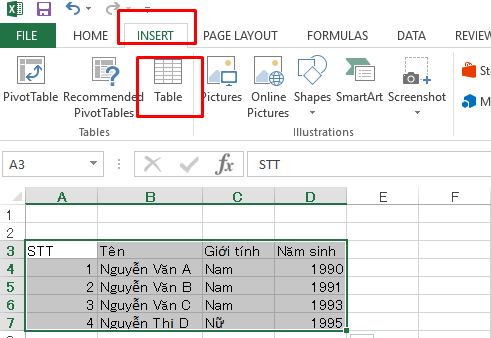
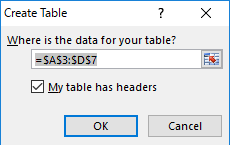
Excel will appear the Create Table dialog box as follows:
- Step 3:
In the Create Table dialog box:
– If the data range you selected in Step 1 already includes the table headers, then check the box: My table has headers.
– If the data range you selected in Step 1 does not include the table headers, then uncheck the box: My table has headers.
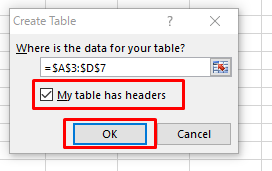
Here the data in step 1 includes the table headers, so you check the box My table has headers and click the OK button.
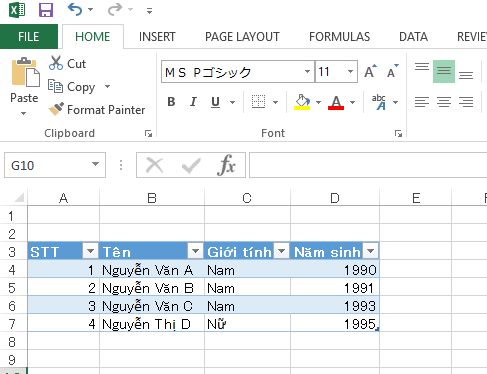
And the result is:
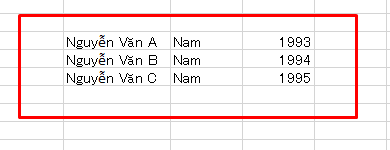
If your data in step 1 does not have a table header. For example
So in the Create Table dialog box, uncheck the box My table has headers:
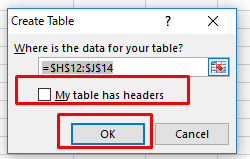
And the result is as follows:
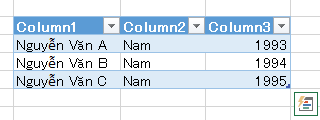
At the top of the column tables will appear with default header names such as Column 1, Column 2 … you can change the title name as you like by double-clicking the left mouse button on the cell to be changed. For example, I changed the following:
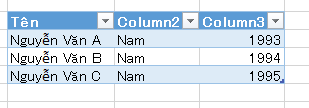
2. Edit Tables in Excel 2013
In part 1, I showed you how to create the simplest table, this part I will show you how to edit the created table.
In part 1 you had the following table:

Change table style
- Step 1: You left-click on a cell in the table (for example, cell Nguyen Van A). You look at the top, the top of the DESIGN Tab will display TABLE TOOLS:

- Step 2: You click on TABLE TOOLS:
The Table Styles section will appear, allowing you to change the table style.

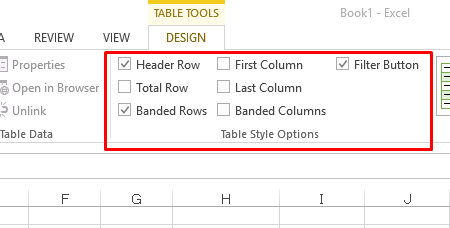
Some other options in the Table Styles Options section:
– Header Row: Hide/show the title of the table.
– Total Row: Hide/show the total row at the bottom of the table.
– First Column: Displays special formatting for the first column of the table.
– Last Column: Displays special formatting for the last column of the table.
Add rows and columns in a table
- To add rows to the table, do the following:
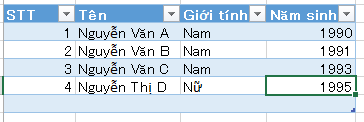
You select the last cell of the last row, click the Tab key on the keyboard, the row will automatically be added. Here, I select cell 1995, then click on TAB, it will be like below:
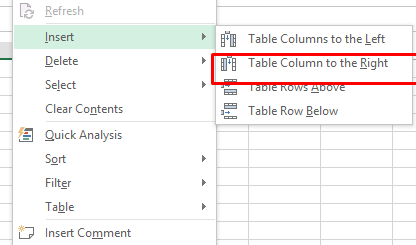
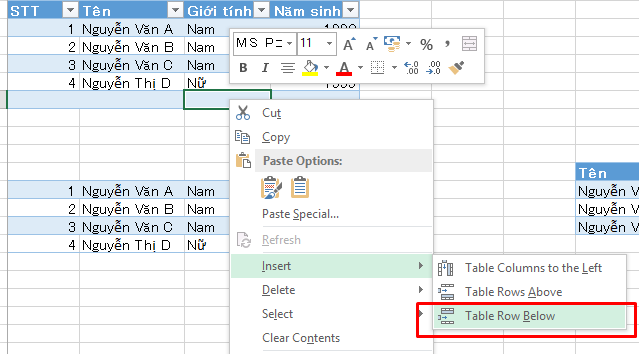
Or you select any cell of the last row in the table, right-click and select Insert -> Table Rows Below to add a row to the bottom of the table.
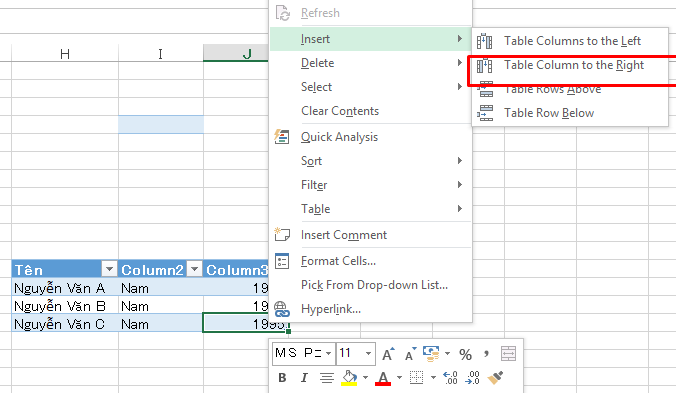
- Add a column: Add a column to the end of the table, select any cell in the table in the last column, right-click and select Insert -> Table Column to the Right.
Conclusion: The above article has shown you how to create and edit tables very simply. Hope the above article will help you without difficulty in this problem.
Good luck.


