

How to insert images into articles in Word 2013
- 28-07-2022
- trienkhaiweb
- 0 Comments
Word is a software application that many people know to use text editing quickly and professionally. Besides, it also allows you to insert many other objects into the text, including typically images. So, how to insert existing images in your computer’s drive. It is difficult or easy, please refer to my article below to understand more.
How to insert images already in the drive
Currently, when editing text, people not only type text, but also insert different images, icons, videos, etc. to support textual text, so that readers and listeners can easier to understand. So now there is a problem: Please compose a piece of text with images inserted according to your preferences?
To insert an image file from the hard drive into the document, follow these steps :
- Step 1: You compose the text as you normally would every day. Then you click on the location where you want to insert the image.
- Step 2: Next, put your mouse on the toolbar, click on the “insert” tab. When the Tab opens, navigate to the “lllustrations” command box and click on “pictures”.
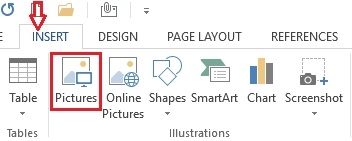
Step 3: The insert window opens, select the image you want to insert into the text and then click “insert” .
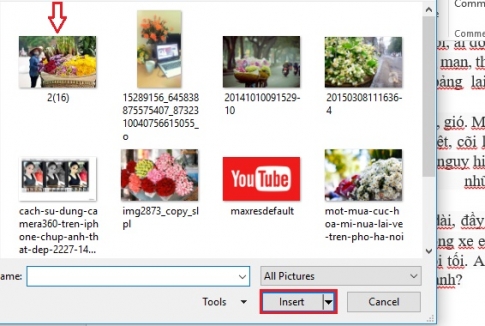
Thus, the image you choose will be inserted on the text you want. Next, in order for the presented photo to have a nice layout, you proceed to edit the image accordingly.
To edit a photo, do the following:
- Step 1: You adjust the size of the image to fit the text. Just hover your mouse over the places with small squares on the image and then move the mouse, you can customize it according to your preferences.

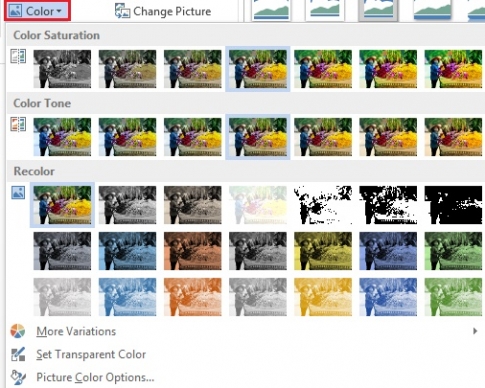
- Step 2: Usually when you insert a picture, the picture will default to one color, if you don’t like it, you can choose another more suitable color by: Clicking on the image a new Tab appears, that is Tab Format . In this Tab, there are many photo editing commands, so you can customize as you like.

Here, I will explain more clearly the command buttons on the Format Tab about image editing for you:
Adjust command group: Changes and selection of color tones for the image file, changes the current image …
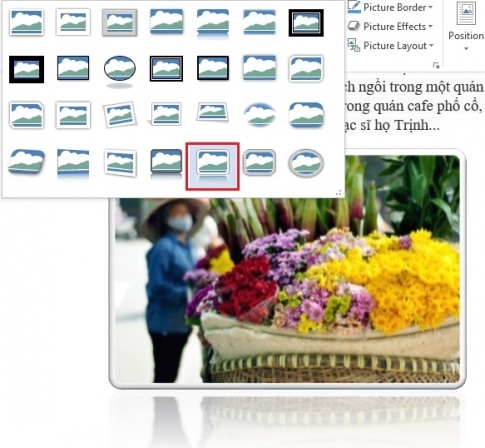
Picture Styles command group: Select the frame for the image file. In addition to the default templates on the screen, you can click the down arrow to have more templates to choose from.
When you hover over any effect you can also see the result described on the image you selected. That will make it easier for you to choose.
Next, you can also edit the border color of the photo by clicking on “Picture Border” and choosing the blood you like.
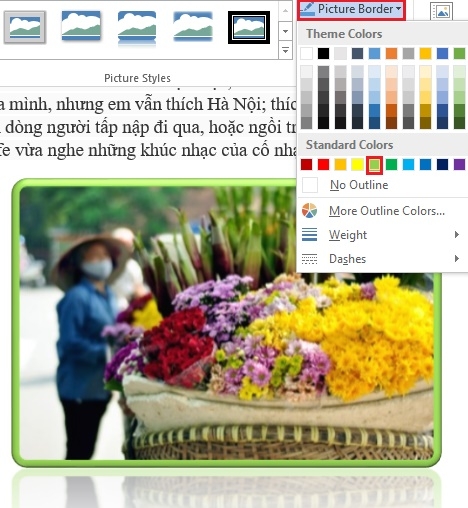
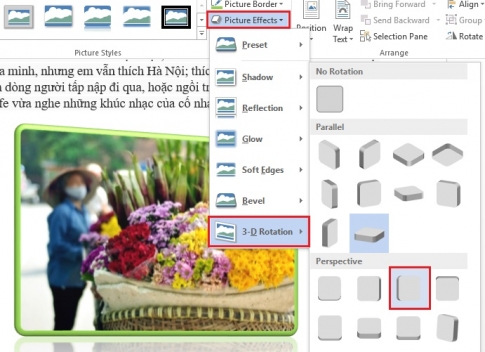
To edit the effect for the photo, click “Picture Effects” . With Word 2013, you have many beautiful and fancy effects for you to choose from.
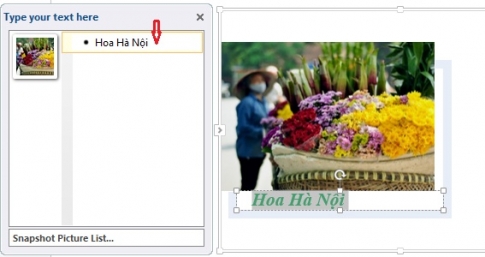
For the Picture Layout command: provides standard layouts for not only presenting but also describing vivid images with many different themes. To do this, click ” Picture Layout” on the toolbar and choose any style and fill in the information you want.
Arrange command group: You use the commands in this group to arrange the position of images on text.
If you want to set the image position in the text, click on “Postion” and choose the appropriate template.
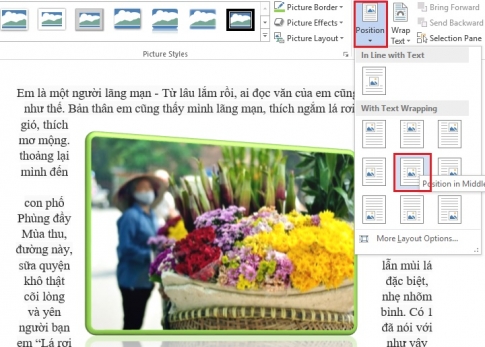
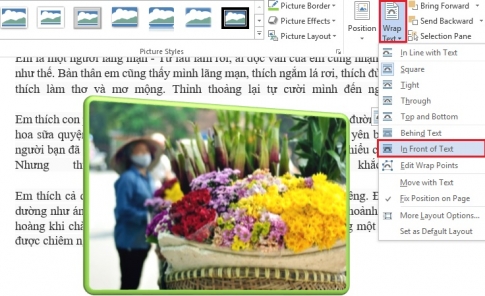
Usually a text page containing images will contain Text content. On those documents you will see sometimes the image on the left, sometimes on the right of the Text content, or the image in the middle is surrounded by the Text content of the text, etc. To set that up, click the icon. “Wrap Text” .
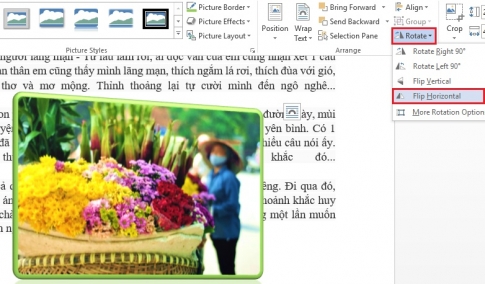
Finally, if you want to rotate the image, you just need to click on “Rotate” and choose the appropriate rotation ink according to your wishes.
Size command group: Used to change the size of the image on the text. Specifically, you can trim the excess image, create height, width for the image… However, to edit the image size, you just need to do it right on the image as step 1 has guided, you don’t necessarily need use this command.
That’s how I showed you how to insert pictures as well as guide you on common operations to use when editing pictures on Word for you. Hopefully, the article will help you gain new knowledge to be able to insert beautiful photos on your text page. Wishing you success.


