

How to insert special objects in Word 2013
- 28-07-2022
- trienkhaiweb
- 0 Comments
Today, Word is not only used to edit documents, but besides, you can also insert other icons to make the text more vivid and attractive to attract viewers. You will not be able to solve all problems in writing, but there will be problems where you have to use a different format to make it easier for others to understand. For example, when you represent numbers, special characters, compare year after year… At that time, using text in words is not the best option, you need to use tools. in Shapes.
So what are those tools and how do you use them? Also check out the article below:
Draw shapes and charts in word with the Shapes tool
Shapes is a group containing special tools that Word 2013 gathers into a group so that users can search and use such as shapes, squares, circles, Lines, other icons containing Text.
To insert an object in Shapes into the text, go to the Ribbon toolbar, click the Insert tab and click Shapes to select.

In Shapes contains many different objects. Therefore, you can choose which objects you want to use in your text. As you can see in the image above, in Shapes there are many objects but these objects are arranged logically with different items. That makes it easier to find along the way.
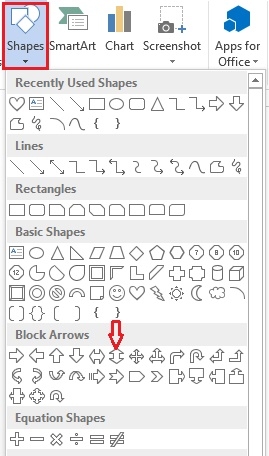
To insert Shapes object on word, do the following:
First you open “Shapes” on the Ribbon toolbar and select an object that you want to use. Next, you put the mouse at the position you want to draw, the mouse will show a plus sign, to draw you hold the mouse and draw the object you choose on the text.
For example, if I choose a two-way arrow to insert text, I get the following results:
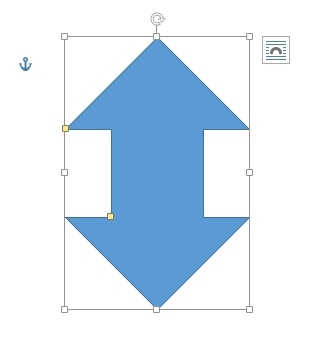
So you have finished inserting the Shapes object. However, to make the Shapes object more beautiful on the text page, you should edit it on the Format tab.
Groups of commands to edit Shapes objects on the Format bar:
Just like when you insert and edit pictures into Word 2013, when you insert Shapes too, when the object is inserted, a new Tab will appear on your toolbar, which is Format.
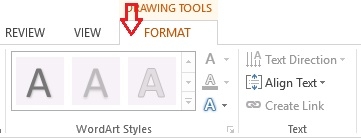
In the article on inserting and editing images in Word , I also introduced you to the command groups on the Format tab. However, for inserting Shapes objects, you will have the opportunity to do a few more commands.
Insert Shapes command group: You will see a box containing different Shapes objects, want to use you just need to click on the down arrow to select. This saves you from having to go back to the Insert Tab as you did in the beginning.
Edit shapes: Allows you to change the shape of the object you originally selected. Just click on “edit shapes” then select “edit Points”.
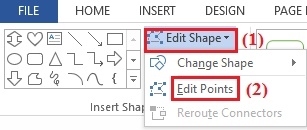
At that time, the object is surrounded by the frame with black points at the corners. To change you just hold and hover at those black points.
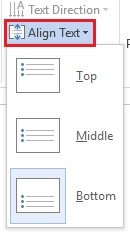
Text command group: You use this command group to manipulate Text content in Shapes objects. After typing the Text, click “Align Text” to align the content in Shapes with three options: align the content to the top of the object, center the object and align the bottom of the Shapes object.
Shapes Style command group : Similar to the Style command group of the image. It provides commands that allow you to choose styles for your selected Shapes object. Besides the styles listed in the list, you can also use other special styles. To use you just need to click on “Other Theme Fills”.
In addition, in the Style Shapes command group, there are other commands such as:
- Shapes Fill allows you to change the background color of objects
- Shape Outline : Allows you to change the border color for the object, change the border color
- Shape Effects : Allows you to customize the image application for Shapes objects.
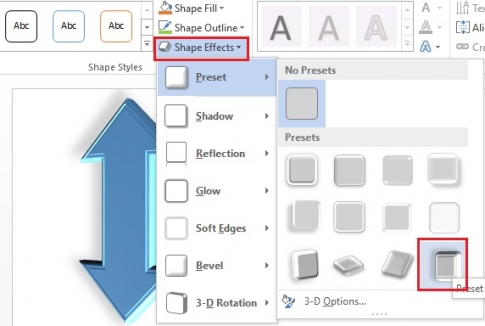
Arrange command group : You are allowed to use commands in this group to arrange Shape object position on text
- Position: You can set the position for the Shape object on the text page by clicking the Position icon. You can choose the position of the Shapes object at the top, bottom, center…
- Wrap Text: Text usually has both text and images, objects. Therefore, this command allows you to insert objects above the content or below the content, to the left of the content or to the right of the content…
- Bring Forward: Displays the Shape object in front of other objects.
- Send Backward: Display Shape object after other images.
- Align : Use this tool to align the margins for one or more Shape objects at a time.
- Rotate: Rotate the Shape object, use this tool to change the direction of Shape objects on the text.
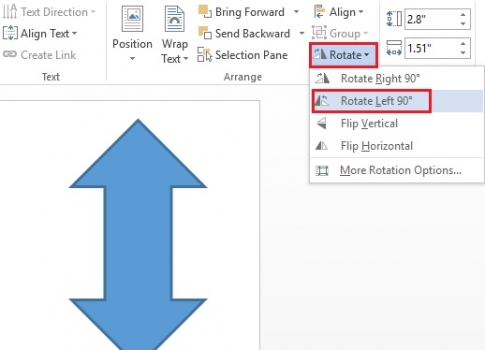
Size command group: Commands in the group allow you to resize and rotate Shape objects.
Note:
- To move the Shapes object, you just need to click on the object and then move the mouse to bring the Shapes object to the position you want.
- To write text on the Shapes object, select “Draw Text Box” in the “Insert Shapes” command group.
So, besides showing you how to insert pictures in Word, today, I have added a new article to show you how to insert Shape objects. With this tool, you can use special objects easily on Word. With so many different objects, you can completely choose the objects you want for your text. Wishing you success.


