

How to merge mail on Word anyone can do it
- 24-07-2022
- trienkhaiweb
- 0 Comments
When you want to send invitations to hundreds of people, which way do you usually use? If you use manual typing, it will definitely take you a lot of time to complete that number. Therefore, if you want to be faster and more efficient, you should use the mail merge feature in word. To better understand this function as well as the steps to do it, you can refer to the article below, I will share with you how to do it.
Instructions on how to merge mail on word
Mail Merge is a form of merging data from one data file into another file. After you have mastered how to format winword documents with formatting techniques such as: Paragraph Formatting, Tab Formatting, Table Creation…. With this feature, you will save a lot of time. significantly when inserting information lists from Excel into documents such as invitations, announcements, report cards, payments ….
To perform the mail merge function you need: Mail Template (original text) and Original Data (information to be filled out).
Here, I'm trying to send the admission notice to the students who pass the university, so I have designed the invitation letter in the word version below:
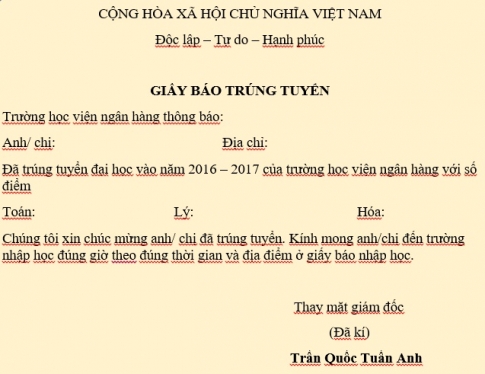
And here is a table of data about the scores and information of the admitted students, I have also prepared in Excel, this file I have saved in the Desktop with the name "middle list".

Steps to merge mail on Word
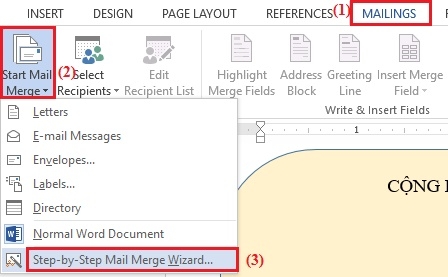
- Step 1: First, click on the "Mailings" Tab on the Ribbon toolbar. When the Tab is opened, continue to select “Strart Mail Merge” and click on “Step – by – step Mail Merge Wizard”.
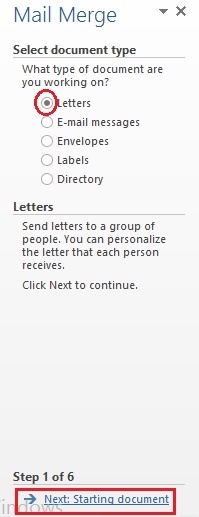
- Step 2: A Mail Merge panel appears on the right side of Word. You tick “Letter” and click on the next step by clicking “next” at the bottom.
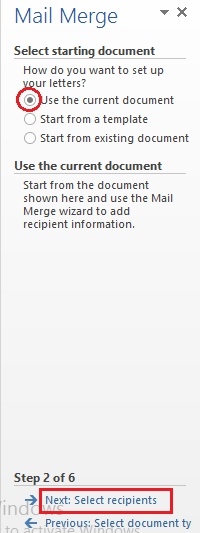
- Step 3: Next, check the box "Use the current document" and click "Next". .
- Step 4: You continue to tick “Use an existing list” and continue to click “next” . At that time, the Select Data Source dialog box appears, select the available list and click "Open".
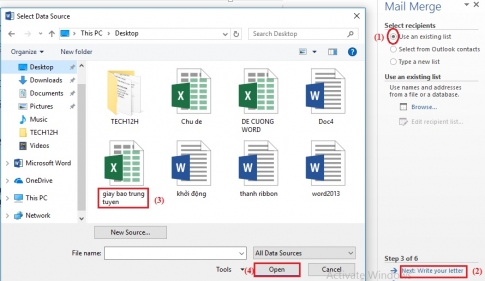
- Step 5: The select Table appears, you just need to select the correct sheet containing the data and click OK.
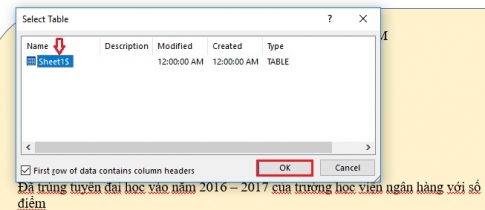
- Step 6: The Mail Merge Recipients dialog box appears. In that dialog box, you select the data to insert by ticking the squares before that data. If you insert all, select the check box next to Data Source. After selecting, click OK.
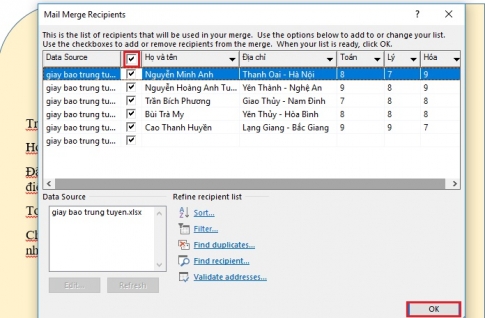
- Step 7: Next, go to the bottom right corner of the screen and click on “Write your letter”.
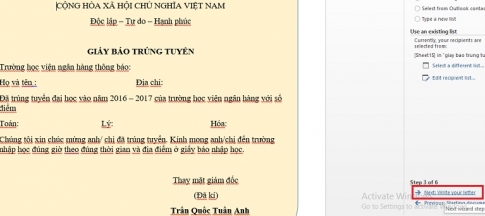
- Step 8: Next step, you put the cursor where you need to insert data. Then, click on “More items” in the “Mail merge” panel. A dialog box "Insert Merge Field" appears, you select the data field where the cursor you selected earlier and click "Insert" to insert.
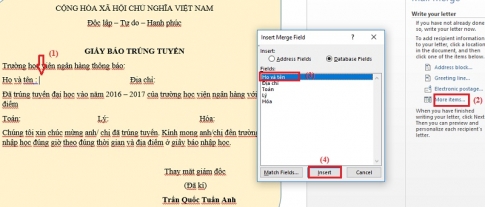
Where there is data to insert, you also do the same steps and insert until all the data you want to insert in the table. This is the result after I have finished inserting all the positions where I need to insert data:
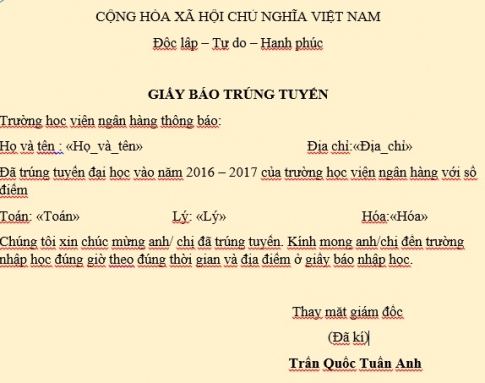
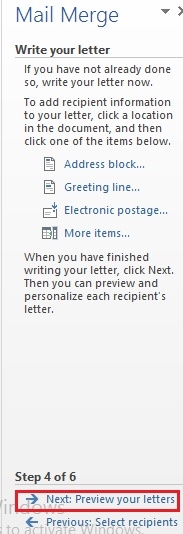
- Step 9: To continue with the mail merge, click on “Preview your letters”.
- Step 10: The next step that you need to do is continue to click "Complete the Merge" in the Mail Merge panel.
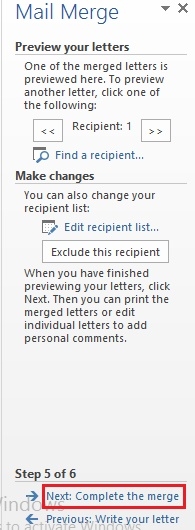
- Step 11: Also on the Mail Merge panel, click on “Edit individual letters…”. The "Merge to New Document" dialog box appears, click on the item that matches your wishes.
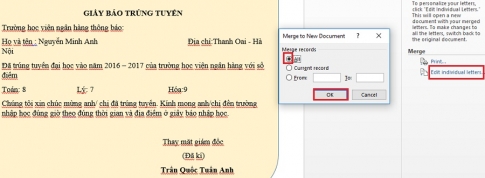
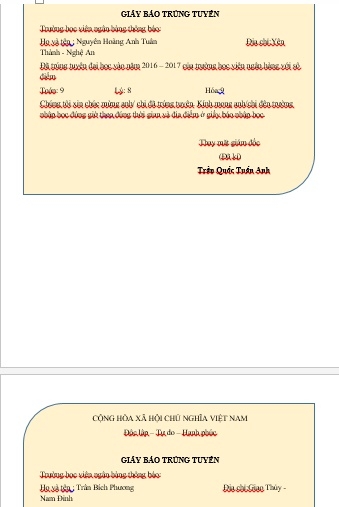
In this article, I want to merge mail for all the data I have set up, so I ticked “all” then “OK” . Your mail has been merged successfully.
Mail merge is one of the utilities that Word helps users significantly reduce word processing time on the computer. This feature is especially useful if you want to insert information such as name, age, address … in the list to send invitations, thank you letters… If you feel this is a good feature in word, you can refer to this feature. Check it out and follow the steps that I give you. Hope the article will be useful to you. Wishing you success.


