
How to set the time for Excel to automatically save, avoid data loss
- 24-07-2022
- thuypham
- 0 Comments
For those who often work with Word and Excel, it will be inevitable that the cases are not good or bad. For example, if you forget to save a post, the power will go out, while you are in the middle of composing, the computer will shut down. Therefore, the safest way is still how you set up the feature to automatically save documents for you. So how to install that feature. Please refer to the following article of Web888 to know more.

It can be said that this is a good feature for users to protect all their documents when having machine or electrical problems. Therefore, not only should you set up automatic time saving in Excel, you should also set up automatic time saving for Word.
Currently, this automatic saving time setting feature has been installed by default on the device. However, its default time level is 10 minutes. That is a rather long and unreasonable period of time. So with different time levels, you can adjust the time to suit you.
Specifically, the steps are as follows:
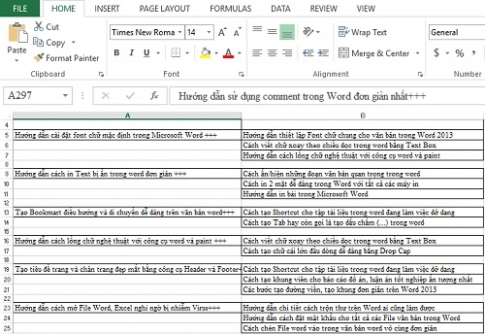
- Step 1: First, you need to open the document file that you are working on to proceed with the automatic saving time setting.

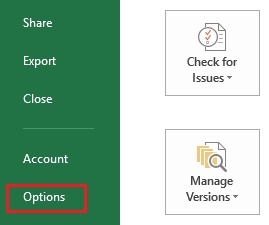
- Step 2: Next, you proceed to click the File Tab on the toolbar.

- Step 3: Click on “Options”.

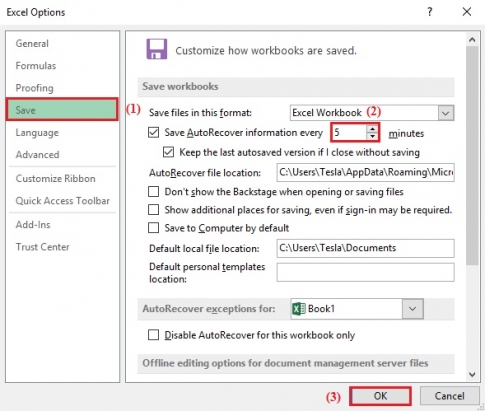
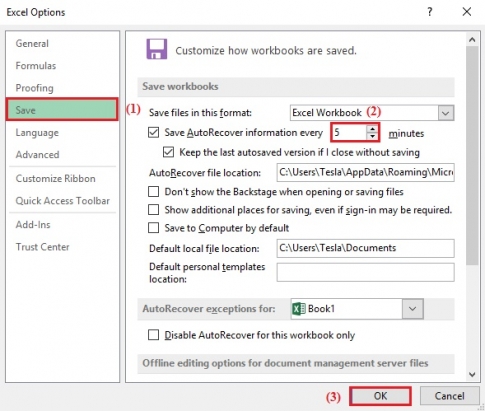
- Step 4: The Options window opens, in the left column of the screen, click "Save". Then switch to the right column and find the Save AutoRecover information every item to adjust the transfer time. Specifically, you just need to click on the up arrow or down arrow icon as shown. Finally, click on “OK”.

Above, I have shown you how to safely protect your document files in the process of working. Because there will be many problems lurking around it, so you need to protect it by setting the autosave time. Besides, you can also set a password for the finished Excel File to protect it.
Good luck.


