

Instructions for aligning Excel margins before printing
- 24-07-2022
- thuypham
- 0 Comments
When using Excel to print data to a computer, to keep the document in good shape and not skewed, you need to align before printing. This is a very necessary condition, but some of you still do not know this. The article below will help you with that.
In this article, I guide you to align the margins for Excel 2013. However, if you use excel 2007, 2010, 2016, the method is similar.
To align margins for Excel 2013 you just need to follow these steps:
- Step 1: First to align the margins, you need to change the default unit of measurement of Excel to cm.
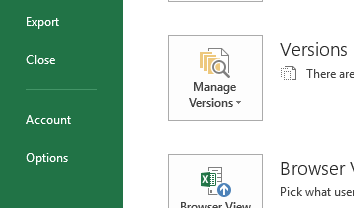
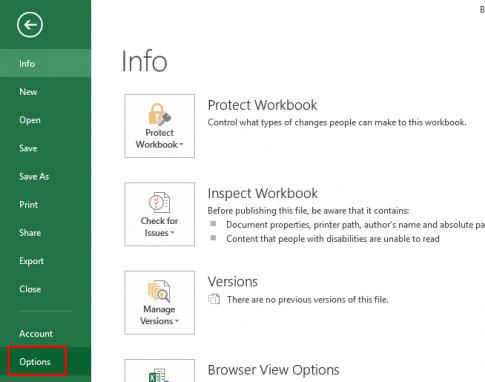
Go to Files and select Options.
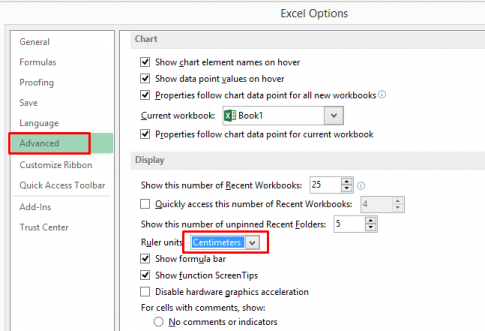
- Step 2: The Excel Options dialog box appears.
In the Excel Options dialog box, select the Advanced tab, then drag the scroll bar to find the Display section.
In the Display section, you change the units from inches to centimeters by in the Ruler units section, you select Centimeters.
Then select OK to save the changes.
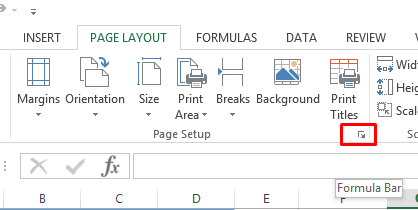
- Step 3: Next to align the margins, select the Page Layout -> Margins -> Custom Margins tab.
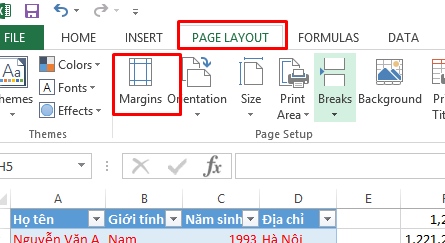
Or you choose the extension icon of the Page Setup item in the Page Layout tab.
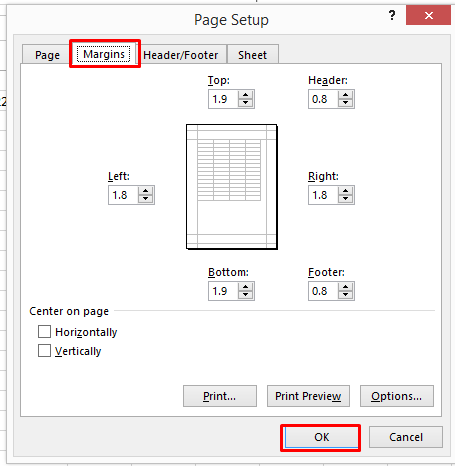
- Step 4: The Page Setup dialog box appears, select the Margins tab , then you format the alignment in the sections:
Left (left), Right (right), Top (top), Bottom (bottom), Header (first header), Footer (end header) as you like.
Finally click OK to save.
Conclusion: In this article, I guide you to align the margins for Excel 2013 before printing. When using Excel to print text this is extremely necessary. Hope this article is useful to you.
Good luck.


