

Tool to insert diagrams in Word 2013
- 28-07-2022
- trienkhaiweb
- 0 Comments
Currently, on Word documents, different objects are often inserted to support textual text, and at the same time help listeners see and understand the problem more quickly. If you want to insert a picture, you can insert it into a Picture, want to insert special characters into Shapes…So, if you want to insert a diagram on the current word document, how do you do it? To solve this problem, I will guide you specifically through the article below.
Smartart – object to insert diagrams into Word.
Smartart is a library of diagrams with different styles and genres. When using Word, you can use this object to draw diagrams such as reports, comparisons, personnel diagrams, company diagrams, increase and decrease indexes, compare objects…
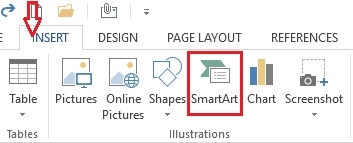
Just like how to insert Shapes objects in Word , to do this, you need to move the mouse on the Ribbon toolbar to select the Insert Tab, navigate to the “Illustrations” command group and select “Smartart”.
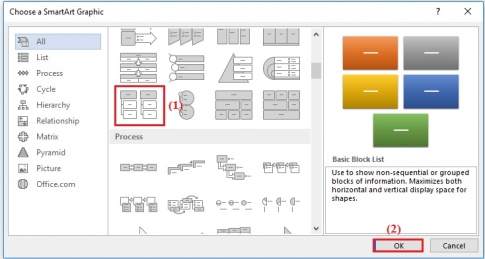
A new dialog box appears, which is “Choose a SmartArt Grapic”. You hover from top to bottom to select a diagram that suits your needs, then click on it and select “OK”.
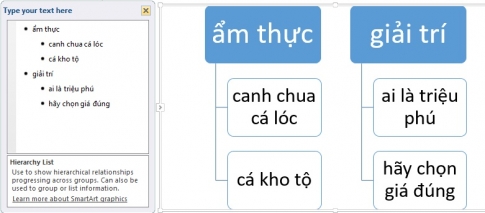
Thus, the Smartart object you selected has been displayed on the current Word page.
Import content and customize Smartart objects.
To enter content into the object you have selected, click on the place where the word “Text” is and type the content you want.
The next job that you need to do next is to customize these components to suit your needs.
To customize the Smartart object, we need to pay attention to the two Design and Format tabs on the Ribbon toolbar.

Note: In the process of importing content for the elements in the Smartarrt object, the font size will automatically be adjusted to match the Shapes objects.
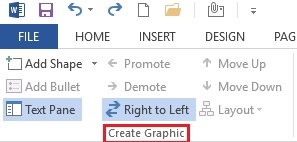
Create Graphic command group:
- Add Shape: Add Shape and SmartArt objects, in addition to using this tool you can also duplicate Shape objects to get a unified Style.
- Add Bullet: Add a paragraph header for the content of Shape objects in SmartArt.
- Text Pane: Toggle the Text Pane dialog box to the left of the SmartArt object.
- Promote: Move the current Shape object to a higher level.
- Demote: Moves the currently selected Shape object down one level.
- Right to Left: Invert Shape objects in SmartArt.
- Reorder up: Move the Shape object up one position.
- Reorder Down: Move the Shape object down one position.
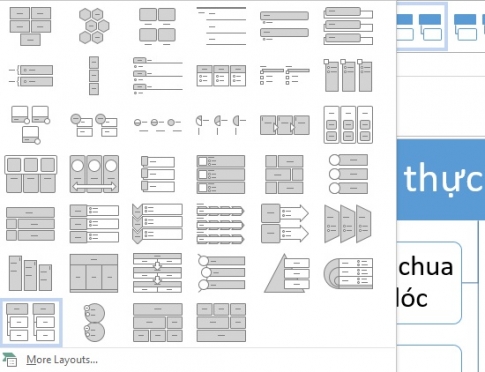
Layouts command group:
A Layouts pane will list all the Layouts in the same group as the Layout you selected so you can choose another Layouts to replace. For more Layout options, just click on the down arrow to select.
SmartArt Styles command group
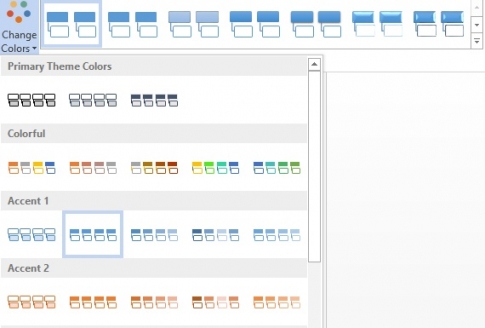
This group of commands allows you to change the color tone, choose the styles available in the command group. Besides the default Styles on the toolbar, you can also refer to other Styles by clicking the down arrow on the command.
Reset command group: In this group of commands, there is only one command, which is the Reset Graphic command, you use this command when you want to return the original format of the selected SmartArt object.
Besides Tab Design, you also need to use Tab Format to edit Smartart. In the articles on inserting Shapes objects or inserting and editing images on Word, I also introduced Tab Format. Please click and review. It is very simple and easy to do.
Above, I showed you how to insert Smartart objects in Word. With a concise, scientific and lively presentation, Smartart is being used by many people when editing documents. In addition, the use of Smartart in Word shows that you are a professional Word user. If you do not know how to insert these objects into Word, please refer to my article and follow the instructions. Wishing you success.


