
Instructions for using the image compression plugin EWWW Image Optimizer
- 24-07-2022
- chuong xuan
- 0 Comments

Instructions for using the image compression plugin EWWW Image Optimizer
Belonging to the project: WordPress User Guide (for newbies)
Image compression is one of the effective ways to speed up WordPress.. Today we will learn how to use the plugin EWWW Image Optimizer – an image optimization tool specifically for WordPress users.
In terms of popularity, the image compression plugin EWWW Image Optimizer with over 600,000 installs is second only to WP Smush. In addition, it is also well-reviewed, with an average score of about 4.5 (up to 5 stars).
The installation part of EWWW if going deep will be relatively complicated, if you only need to use it at a basic level, then reading part 1 & 2 is enough and then move on to part 7. If you want to be more in-depth, you need to read more parts. .
In addition, we have an article comparing 5 image compression plugins for WordPress , giving you a better overview in choosing.
And now let's find out EWWW.
Mục lục
Feature
- EWWW compresses JPG, PNG and GIF image formats. The free version mainly only allows lossless style compression.
- This plugin supports converting images to WebP format, which is a more space-saving image format than JPG & PNG.
- EWWW can also compress PDF files, but only in the paid version.
- The free version does not limit the number of compressed images as well as the size, it uses the hosting's resources to compress. New paid version using API.
Basic settings
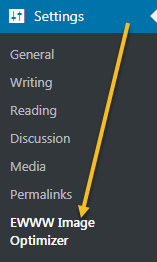
When entering this area, right at the top, you will see the message EWWW Image Optimizer wants to collect some data about how you use the plugin, if you agree, you will receive an additional 500 free image compression credits.
The one below is similar, they collect more information, can go to the admin page to edit when needed. In general you should not accept (Disallow). And I Allow (accept) the above just to get credit, so feel free to experiment with the free image compression in this post:

Looking down below, in the Basic Settings section are the basic settings you need to pay attention to.
A. API key

With the EWWW plugin, only paid users need to enter the API key, we are using the free version so we will skip this part.
B. Debugging

In case you need support, fix errors, tick this option so that the plugin support team can intervene more deeply into the source code of the page.
C. Eliminate redundant data

Default is checkbox. It is recommended to leave it as is, this eliminates redundant image data such as EXIF data (aperture, ISO, shutter time, etc.)
D. Image compression levels
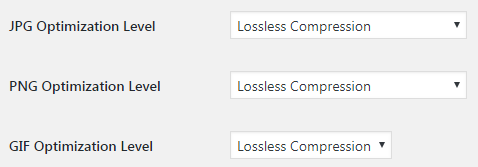
The default EWWW for image compression is lossless for all 3 types of images JPG, PNG and GIF.
The only options that differ from JPG in the paid version (which need to enter an API key) are:
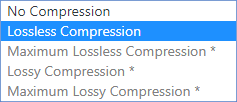
- Maximum Lossless Compression : Highest optimization with lossless compression, to reduce images even more.
- Lossy Compression : Compressing images loses quality. Image quality is degraded, but image size is also reduced more.
- Maxium Lossy Compression : Highest optimization with lossy compression.
Similarly, options other than PNG only in the paid version (marked with *) are:
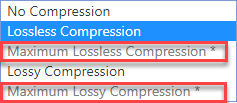
The difference with JPG is that the PNG lossy compression (Lossy Compression) option is used with the free version and does not require an API key.
GIF images have no other compression options.
Also all formats have a No Compression option. This means no compressed images. Any format you don't want to compress, select Uncompress.
E. Compress PDF files

It's useless with the free version, since you only have the option of No Compression (no compression). Other options are only available in the paid version.
If you are interested, there is now a ShortPixel plugin that offers the option to compress PDF image files even in the free version.
F. Backup photos on the server

It will store a copy of the original images on EWWW's servers for 30 days, which is also not selected in the free version.
Finally click Save Changes to save the settings.
Advanced settings
To switch to advanced settings, select Avanced Settings:

It has the following options:
A. JPG Image Quality

The default quality is 82. A valid number to fill in this section ranges from 1 to 100. This metric will be applied in editing, resizing, PNG to JPG conversion, and JPG to JPG. WebP.
The advice is that you should not touch this part if you do not understand its meaning, and should not let the index be lower than 82.
B. Parallel Optimization

Default is not selected.
If you check this box, all resizing made during image upload will be optimized in parallel to make the optimization process faster.
This feature can make your hosting slow, if so when checked, please uncheck to return to default.
C. Scheduled Optimization

Default is unchecked.
If you check this box, it will allow you to schedule uncompressed image optimizations in your theme, buddypress, and any folders added as you make the adjustments below. Runs for hours: wp_cron runs only when your site is visited, so it may take longer between optimizations.
D. Include folders in the Media library

Default is unchecked.
If checked, it will scan all images from the latest two folders of the Media library while doing Batch Optimizer and Scheduled Optimization.
E. Specify the directory to be optimized
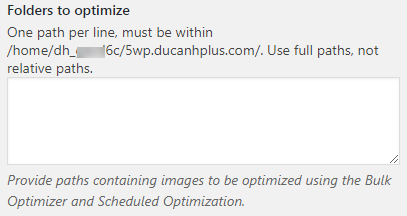
There may be folders containing the images you need to optimize outside of the Media Library, allowing you to copy those links into, one at a time. The requirement is that you need to provide exact & complete path, not relative path.
This feature is good, but the method of EWWW Image Optimizer is a bit difficult for the average user. Choosing an intuitive directory like that of the WP Smush image compression plugin is much easier for users.
F. Specify the directory without optimization
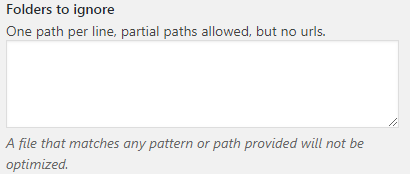
If you have a folder of images that you don't want to optimize and compress, please include its path here, one for each folder path.
Only directories are accepted, you may not include specific URLs.
Any files that match the pattern or path will not be optimized.
G. Data collection options
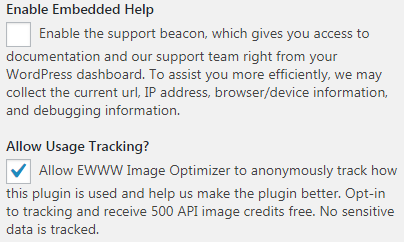
This part I talked about at the beginning of the article, it is related to the collection of user data, usually we will not allow the application to do that.
Finally click Save Changes to save the settings.
Set the resizing method

A. Enable ExactDN
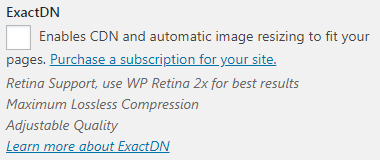
Default is unchecked.
This feature is only available if you are on a paid plan. When selected, select ExactDN to enable the CDN service (provide your images on a server near the user to help them load faster) and automatically resize the images to fit the page.
Since we use the Free version, we don't need to dig into it for the time being.
B. Identify images that need resizing

Default is unchecked.
When highlighted, images that need to be resized will be highlighted when the plugin notices that the browser is shrinking the image for display. This is visible only to Admins and it adds a button to the admin bar to define such images.
C. Resize images in the Media library

The default value is zero in both width and height. This default means that you keep the image size when uploading it to the Media library.
You should adjust these parameters if you have a website that has been operating for a long time, or the current website makers do not have much experience, the possibility of you or someone else uploading large images. It is very easy to abuse it.
If you change these metrics, the plugin will convert images with a larger width or height to the number you set. For example, if you set the Max Width to 1024px, any images you upload to the Media library (as you set the parameters above) that are larger than 1024px in width, will be reduced to this size.
D. Resize the image elsewhere
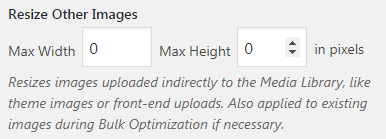
This section has the same meaning as the C section, except it applies to images that aren't in the Media library, like images created by themes or images created by plugins. This also applies to images that already exist during Bulk Optimization if necessary
E. Resize uploaded images (old photos on website)
By default, unchecked.
If you tick EWWW Image Optimizer, it will resize the images in the Media library according to the parameters you selected in section C.
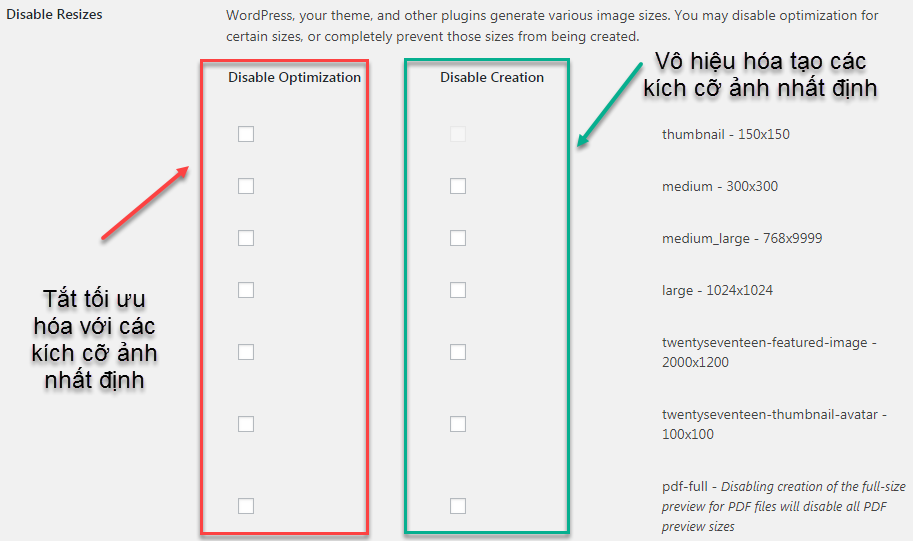
F. Disable resizing
Default is unchecked.
Your WordPress, themes, and plugins typically generate a variety of image sizes. In this section, you have the right to prevent them from creating such images, as well as the right to prevent the optimization of certain image sizes by ticking the corresponding option.
Usually you don't need to do anything in this section, just leave the default.
Finally click Save Changes to save the settings.
Set the format conversions
The conversion only allows images in the Media library (except WebP format). By default, all images will have a link in the Media Library for a one-time conversion. Changing the options below will enable the conversion filter whenever a photo is uploaded or edited.
Note: The plugin will attempt to update the new image format's path for any posts that contain the old image format's link. However, you will still need to manually update these URLs for the converted images (which can be difficult if you have a lot of posts and photos to change).
A. Hide the conversion link
Default is unchecked.
If checked, other users on WordPress will not see this conversion link.
B. Delete the original image
Default is unchecked.
If checked, it will delete the original images from the server after successful conversion.
I recommend leaving the default (i.e. unchecked) so you can get the original image back when needed.
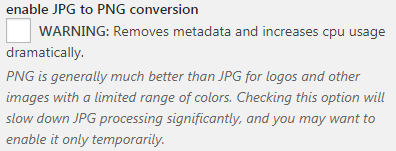
C. Convert from JPG to PNG
Default is unchecked. And you should leave it as default.
With regular, colorful images, switching from JPG to PNG will greatly increase the image size.
Converting from JPG to PNG is only useful for images like logos or images with limited colors.
This feature of EWWW Image Optimizer which I see is like drawing snakes with extra legs. Because very few people will need it.
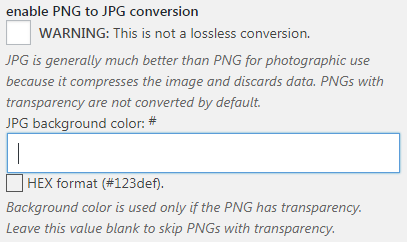
D. Convert from PNG to JPG
Default is not selected. And in most cases, you should leave it as default as well.
You may want to check this box in case the images on your website are mostly photos (nature, people, etc) and a large number of them are PNGs.
Photos taken in PNG format will be very large and for optimization you may want to convert to JPG.
For example this PNG image:
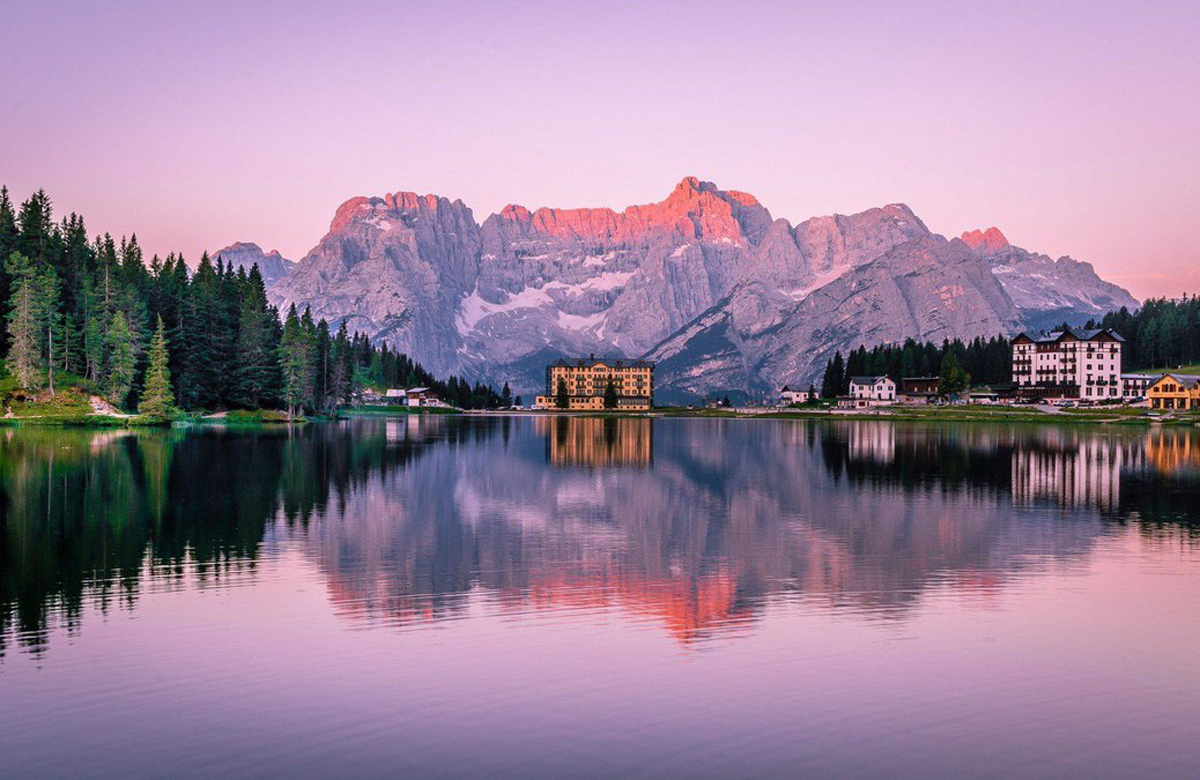
Image size 800px * 603px but up to 1 MB.
After converting to JPG, it is much smaller in size, only 213 KB, the quality is almost unchanged:
You can manually convert each PNG image to JPG once it's in the gallery, which is great if your site doesn't have too many problematic PNGs.

By default, even if selected, PNG images with transparency properties (e.g. logos) will not be converted to JPG. Because JPG images do not have transparency properties, attempting to convert them may damage the value of the image.
E. Convert GIF to PNG
Default is unchecked.
If selected, the GIF image will be converted to PNG format. In general, PNG is better than GIF, so this option can be useful if your site has a lot of GIFs.
Of course, animated GIFs won't be converted to PNGs, because PNGs don't support animation.
Finally click Save Changes to save the settings.
WebP related settings
A. Convert JPG/PNG to WebP
Default is unchecked.
When you check this box, the EWWW Image Optimizer will add the WebP image format to the existing image, whether it's in or out of the Media library.
WebP is a new image format developed by Google, it has a significantly reduced size compared to JPG and PNG, while the quality is almost unchanged.
There are a few caveats when using this format:
- When converting from JPG to WebP, the image quality degrades but is very small
- When converting from PNG to WebP, the image quality does not degrade
- Original JPG and PNG images remain on your hosting
- WebP Photos is currently only supported by some browsers (including Google Chrome & Opera)
- The WebP image in this option is only created when it is smaller than the original JPG or PNG image size.
If your website has a lot of traffic, like 100,000 views/month, then using WebP might be the right choice.
In addition to EWWW, you can also use ShortPixel to convert images to WebP. I myself have used ShortPixel to transfer over 12,000 partner photos to WebP to optimize WordPress page loading speed.
B. Forcing to WebP
Default is unchecked.
When selected, WebP images will be created from all JPG/PNG images regardless of their size (even if the generated WebP image is larger than the original image).
Finally click Save Changes to save the settings.
P / S: This part 5 has two more customizations at the end, but I don't understand it yet, I will add it to you when it feels ok.
Compress old photos uploaded to the website
You need to enter the Bulk Optimize function:
The following interface appears:
(1): By default, the plugin will ignore pre-optimized images. If you check this, it will try to re-optimize, even though the image is already compressed (usually this won't help reduce any more space so you can leave it as default).
(2): This is the option related to how much will you leave the compressed image between compressions? It can work in case your website has a lot of images, and the hosting is not strong, then the distance between image compression will help the host not be overloaded. If your hosting is powerful enough, leave it as default.
(3) WordPress notices the number of images in the Media library, click Scan for unoptimized images to scan and compress.
After clicking the above button, you will see the actual number of images to compress, which should be more, as it includes the thumbnails that WordPress automatically generates for the images you upload:
Compression takes place:

This process is slow and fast depending on the number and size of images on your website, but usually the compression of EWWW Image Optimizer takes longer than other normal image compression plugins because EWWW is using your hosting to compress. while other plugins use the API.
To check the compression level of the image, go to the library, then click the (+) sign for the corresponding image:
Result message pop-up:
Try compression with some pictures
Lossless Compression (JPG):

Original image file: 222 KB
Resolution: 800px * 533px
Lossless Compressed Image: 180 KB
Capacity reduced: ~19%
Image quality: no degradation
Lossless Compression (PNG):
Original image file: 8.35KB
Resolution: 139px * 244px
Lossless Compressed Image: 4.5KB
Capacity reduced: ~46%
Image quality: no degradation
Conclusion
EWWW gives JPG image compression quality comparable to other plugins. My general conclusion is that plugins do not differ much in terms of JPG compression.
EWWW's PNG image compression is equivalent to ShortPixel's.
The strength of this plugin is that even the free version has no limit on total image size, nor monthly uploads like many other plugins. Also, it puts no limit on the size of each image.
Another plus is that EWWW has a lot of functionality (although it will be confusing at first) that advanced users may need.
EWWW is the best image compression plugin for the price. I used to use Imagify before, but now I use EWWW to compress images on this blog.
Tools used by EWWW
The conclusion should have been at the end, not this part of the tool, but it was too technical, and few people cared, so I left it at the bottom.
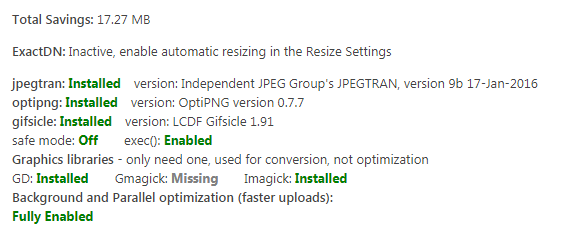
As soon as we go to the Settings section, we will see this information appear at the top:
- Total Saving: shows the size of the image that we save after compression
- ExactDN: Inactive, meaning This Service is currently inactive, this feature is paid to use. We are free users so we don't care
- jpegtran: Installed – This is the EWWW Tool used to compress JPG images, this paragraph says that jpegtran has been installed successfully
- optipng: Installed – This is the EWWW Tool used to compress PNG images, optipng has been installed successfully
- gifsicle: Installed – This is EWWW Tool used to compress GIF images, gifsicle has been installed successfully
- Graphics libraries – Graphics libraries, used to convert image formats, just need to install one

