Định tuyến trong ứng dụng React với React Router
Trong React, bộ định tuyến (Routers) giúp tạo và điều hướng giữa các URL khác nhau để xử lý logic khi người dùng muốn truy cập các module khác nhau trên ứng dụng web của bạn. Chúng cho phép người dùng di chuyển giữa các thành phần của ứng dụng trong khi vẫn duy trì trạng thái của người dùng và có thể cung cấp các URL duy nhất cho các thành phần này để làm cho chúng dễ chia sẻ hơn. Với bộ định tuyến, chúng ta có thể cải thiện trải nghiệm người dùng của ứng dụng bằng cách đơn giản hóa việc điều hướng trang web.
React Router là một trong những framework định tuyến phổ biến nhất cho React. Thư viện được thiết kế với các thành phần trực quan để cho phép bạn xây dựng hệ thống định tuyến khai báo cho ứng dụng của mình. Điều này có nghĩa là bạn có thể khai báo chính xác thành phần nào của bạn có một lộ trình nhất định. Với việc khai báođịnh tuyến, bạn có thể tạo các đường dẫn mà người dùng có thể đọc được, giúp quản lý kiến trúc ứng dụng của bạn dễ dàng hơn.
Bước 1: Cài đặt react Router:
npm install react-router-domBước 2: Tạo các component cho các trang khác nhau:
Tạo file Main.js
import React, { Component } from 'react';
import axios from 'axios';

class Main extends Component {
    constructor(props) {
        super(props);
        // send request axios sample
        this.state = {
            products: []
        }
    }

    async componentDidMount() {
        try {
          const response = await axios.get('http://localhost:3000/data.json');
          this.setState({ products: response.data });
          console.log(this.state.products);
        } catch (error) {
          console.error('Error fetching data:', error);
          //this.setState({ error: 'An error occurred while fetching data.' });
        }
    }

    render() {

        return (
            <div>
                {
                    this.state.products.map((item, index) => {
                        return (
                            <div key={index}>
                                <div>{item.name}</div>
                                <div>{item.price}</div>
                                <div>{item.description}</div>
                                <div>{item.image}</div>
                            </div>
                        )
                    })
                }
            </div>
        )
    }
}

export default Main
Tạo file Page2.js
import React, { Component } from 'react';

class Page2 extends Component {
    constructor(props) {
        super(props);
        this.state = {
            data: ""
        }
    }

    render() {

        return (
            <div>
                <h1>Page 2</h1>
                Noi dung sdfsdf
            </div>
        )
    }
}

export default Page2
Tạo Header.js
import "./Header.css";
import { BrowserRouter, Link, Route, Routes } from 'react-router-dom';

function Header() {
    // dinh nghia bien la thuoc tinh


    const menus = [
        {
            href: "/",
            label_text: "Home"
        },
        {
            href: "/page2",
            label_text: "Page 2"
        }
    ];


    function tudinghia(e, data) {
        console.log(data);
    }

    return (
        <div className="headerWrap">
            <div className="header">
                <div>Logo</div>
                <nav>
                    <ul>
                        {
                            menus.map((item, index) => {
                                return (
                                    <li ><Link to={item.href}>{item.label_text}</Link></li>
                                )
                            })
                        }
                    </ul>
                </nav>
            </div>
        </div>
    )
}

export default Header;
Sửa file Main.js
Lưu ý, ở v6, chúng ta sử dụng <Routes/> và <Route/>, còn ở v5, chúng ta sử dụng thẻ <Switch/> thay thế.
import logo from './logo.svg';
import './App.css';
import Header from './Header/Header';
import Footer from './Footer/Footer';
import Main from './Main/Main';
import { BrowserRouter, Route, Routes } from 'react-router-dom';
import Page2 from './Page2/Page2';

function App() {
  return (
    <div>

      <BrowserRouter>
        <Header />
        <Routes>
          <Route path="/" element={<Main />} />
          <Route path="/page2" element={<Page2 />} />
        </Routes>
      </BrowserRouter>
      <Footer />
    </div>
  );
}

export default App;
Bài tập
Question 1:
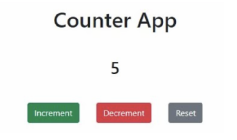
Create a functional component called Counter with two buttons and a counter
value displayed on the screen.
Use the useState hook to manage the counter state.
When the <Increment> button is clicked, increment the counter by 1.
When the <Decrease"> button is clicked, decrease the counter by 1.
When the <Reset"> button is clicked, counter = 0.
Render the Counter component in the App component.
Question 2:
Create a functional component called DataFetcher.
Use the useEffect hook to fetch data from the data.json(or data.js) file located
in the public folder.
Store the fetched data in the component's state.
Render the fetched data on the screen.
Render the DataFetcher component in the App component.

Data:
{
  "id": 1,
  "name": "Nike Zoom KD 12",
  "badge": "NEW",
  "category": "Men's Running Shoes",
  "sectionTitle": "PRODUCT INFO",
  "description": "Ensure a comfortable running session by wearing this pair of cool running shoes from Nike.",
  "colors": [
    {
      "name": "Blue",
      "hex": "#5B7CFA",
      "active": true
    },
    {
      "name": "Red",
      "hex": "#E06A5F",
      "active": false
    },
    {
      "name": "Green",
      "hex": "#7CC576",
      "active": false
    },
    {
      "name": "Orange",
      "hex": "#E8893C",
      "active": false
    },
    {
      "name": "Black",
      "hex": "#4A4A4A",
      "active": false
    }
  ]
}
Question 3:
Implement routing in your application using the react-router-dom library.
Create two routes: / and /about.
Create a component called Home to be rendered when the / route is active.
Create a component called About to be rendered when the /about route is
active.
Add navigation links in the Header component to navigate between the routes.
Question 4:
Create a functional component called List that receives an array of items as a
prop. Map over the array and render each item as a list item (<li>).
Render the List component in the App component, passing the data array
from the DataFetcher component as a prop.
Question 5:
Create static components for the Header, Navigation, and Footer.
The Header component should display a title for the application.
The Navigation component should display navigation links.
The Footer component should display copyright information.
Render these components in the App component.
Bài viết liên quan:

Dịch vụ thiết kế Wesbite